1953 Rover P4 75 - "Moneypitty"
Return to Home
Return to Resources
Return to Rover page
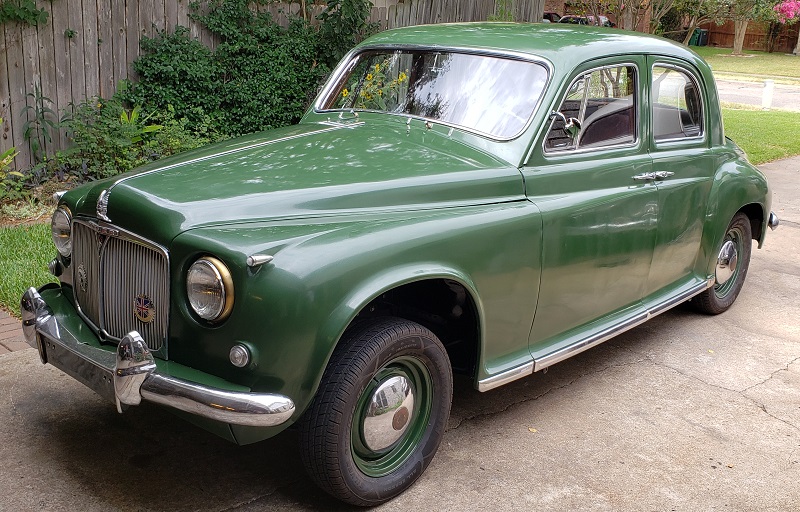
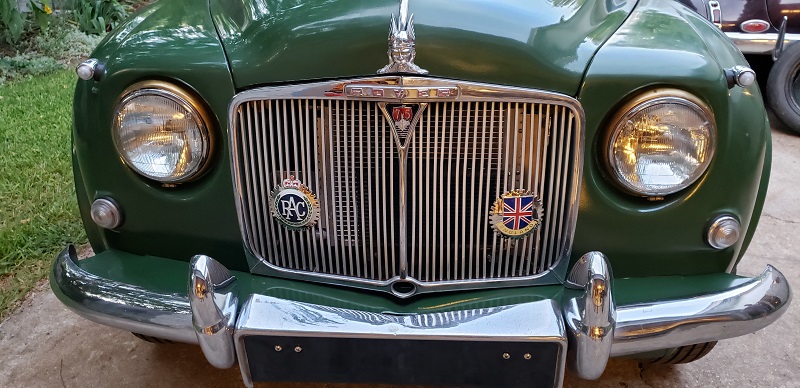
This was my first Rover, a 1953 P4 75 purchased for $200 in January 2018. This P4 no longer had the original engine and drivetrain. Although an engine swap detracts from the value and originality, it is an understandable change considering how difficult it might have been to maintain or repair the engine in the USA during the mid-1990s when I suspect the swap had occurred. In place of the original 2.1L 6-cylinder Rover IOE engine was a Toyota 22R 2.4L 4-cylinder transplanted from a 1982 Celica mated to an Aisin-Warner A43D 4-speed automatic transmission taken from a late-1980s Toyota Pickup. If anyone wanted to do a Rover resto-mod in 1990 then a Toyota 22R is an excellent engine choice being among the elite group of indestructible engines that are known to run for many hundreds of thousands of miles. In the 5 years since I completed restoration of this car, I have seen at least a handful of other 1953 models pop up for sale, and over half of them did not have the original engine. Even one of these examples had an identical 22R swap!
I decided to restore the Rover instead of scrapping it. Having never done a full frame off restoration before and the Rover was in need of one, I saw an opportunity to acquire restoration knowledge and hone my skills on the Rover before taking on the 1940 Buick Super project. At the same time, I would at least save the Rover when many others wouldn't bother to invest the time and money in a rare vehicle that has limited collectible value in the USA. The rest of the content you will find here on the Rover P4 are spread out across several pages as a restoration diary starting from the initial purchase, tear down to the bare frame and ground up restoration. I hope you enjoy the pictures and find some of the content useful as there is limited information and pictures on the Internet regarding these unique cars.
I sold the car in 2024 because I had acquired a second 1953 that was all original.
Restoration Diary
Here is a video that gives you a quick 5 minute overview of the entire 20 month restoration process.
2018 01 - Initial condition
2018 02 - Tear down (Part 1)
2018 02 - Tear down (Part 2)
2018 03 - Frame clean up
2018 04 - Frame paint
2018 05 - Front suspension and brakes
2018 05 - Rear axle and brakes
2018 06 - Engine and transmission tear down
2018 07 - New exterior color selection and wheels
2018 08 - Body clean up and repair
2018 08 - Body sand blasting and paint
2018 09 - Body back on frame
2018 09 - Engine, transmission, and steering
2018 10 - Exhaust header, engine start up and fender work
2018 11 - Dash restoration and throttle linkage
2018 12 - Finished fenders and more sand blasting
2019 01 - Brakes, column shifter and finished body reassembly
2019 02 - First test drive!
2019 04 - Front windshield and seat
2019 04 - Prep for final paint
2019 05 - Final paint!
2019 05 - Trim and windshield installation
2019 06 - Rear seat and miscellany
2019 07 - Upholstery!
2019 07 - Fuel tank
2019 08 - Second test drive!
2019 08 - Final touches
2019 09 - First show debut at the Texas All British Car Days (TxABCD)
2024 07 - Sold to Pasadena, CA!
Miscellaneous Technical Notes
Wiring diagram customized for this particular P4.The original Rover P4 fuel gauge relies on two electromagnetic solenoids inside the gauge. One terminal is always powered by 12V, the gauge case is grounded, and the other terminal goes to a variable resistor (sender) that varies the resistance to ground. For original P4's with a positive chassis, the polarity of all the aforementioned terminals are reversed and still will work. For this particular P4, I also used another electrical fuel gauge for the temperature gauge since the original temperature gauge was a capillary type incompatible with the Toyota 22R engine.