1968 Rover P5B Coupe
March-August 2025 - Mechanical work, engine bay and first start
Return to Home
Return to Resources
Return to Rover P5B page
All the rubber hoses in the cooling system were replaced. I learned that there is a steel coolant bypass tube that is mounted under the manifold that rusted through and leaked. This provided an opportunity to replace the entire rusty intake manifold gasket and seals, and to easily clean, strip and repaint the intake manifold.
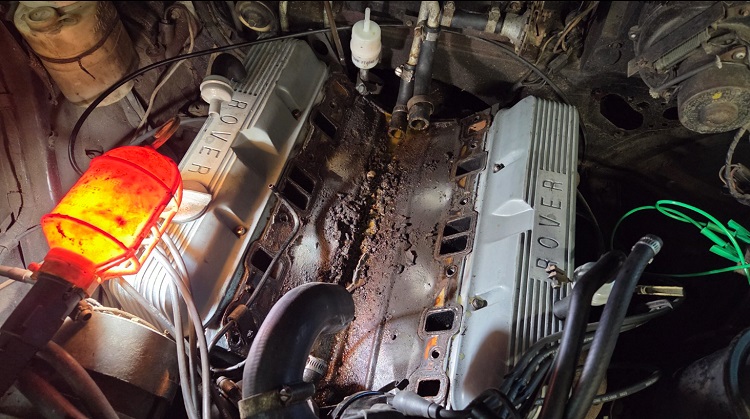
While I was at it, the thermostat and electric temp gauge sensor were also replaced. Also there is a small hose connector at the upper left corner of the front center manifold where the right-hand side carburator mounts that carries a small amount of coolant to the radiator. This connector may tend to rust shut as happened in my case so I had to drill through to reopen this passage.
Both SU carburetors are the HS6 type not too different from the earlier SU types used on the 6-cylinder Rovers. I thought it was easier to rebuild the HS6 because the entire jet assembly including the fuel supply line to the float reservior is replaceable. The older SU types had the fuel delivery integrated into the body and requires more cleaning to ensure there's no clogs. Both SU carbs were removed from this Rover and rebuilt with new seals, new jets, etc. and roughly adjusted following the rebuild kit instructions. I did not document this process as it is generally well documented elsewhere.
The ignition system was refreshed with new NPK BPR5HS spark plugs, new leads and connectors, new distributor cap and points. The distributor vacuum advance was tested to still hold vacuum and operate, so no replacement was needed. I proceeded to try to start the engine to assess if it was operational or had more severe mechanical issues before investing more into mechanical work on it. I used a small cup with a hose attached to the carburetors and filled with gasoline to supply fuel by gravity temporarily while starting the engine without relying on the fuel pump.
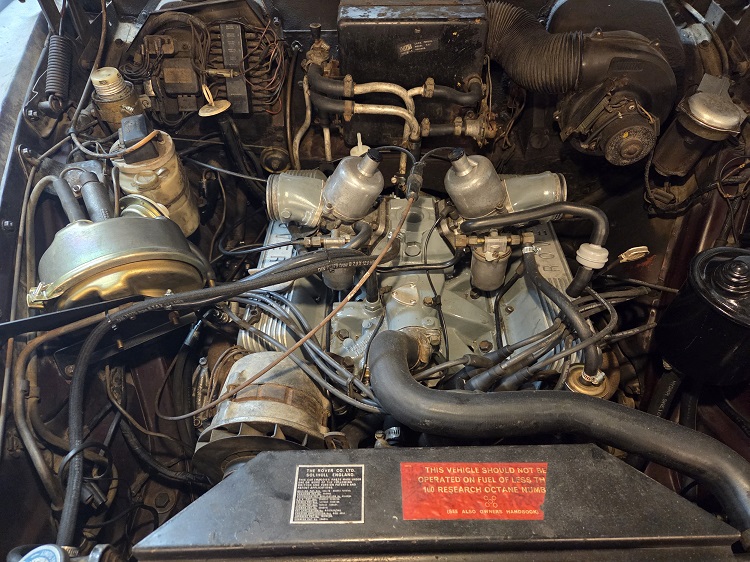
Success! Engine started and seems to run smoothly without any noticable mechanical concerns. The condition of the engine was unknown to me at the time of purchase so it was a relief to see that it still runs well. I proceeded to do more mechanical work around the engine including bypassing the original AC Delco mechanical pump and replacing it with a 12V Unipart PRC3901 electric pump mounted on the left hand side inner fender, as seen in the bottom (the shiny brass dome with 2 hoses) of the following picture.
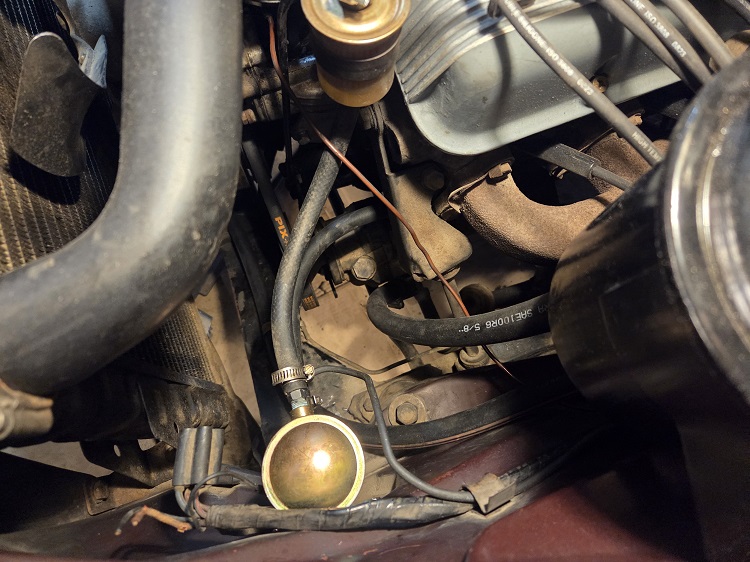
Power is supplied from the 12V ignition power near the ignition coil. The fuel tank was inspected with a cheap borescope and appeared to be in good condition with no rust deposits or wax at the bottom so I did not remove it to clean or reseal. The pick up tube was flushed and cleaned. Also originally this car had a pull control on the dash for main/reserve and it was a cable to a valve located at the bottom center near the end of the transmission, but this was bypassed by someone prior to me. I have acquired the valve and cable and will restore this correctly at a later time.
The RHD Hydrosteer power steering box was purchased from David Green in the UK and rebuilt by John Wallet before being shipped to me. This was cheaper than me shipping my own box over there, and RHD boxes are plentiful there to buy used. All the hoses were replaced with new ones from JR Wadhams.
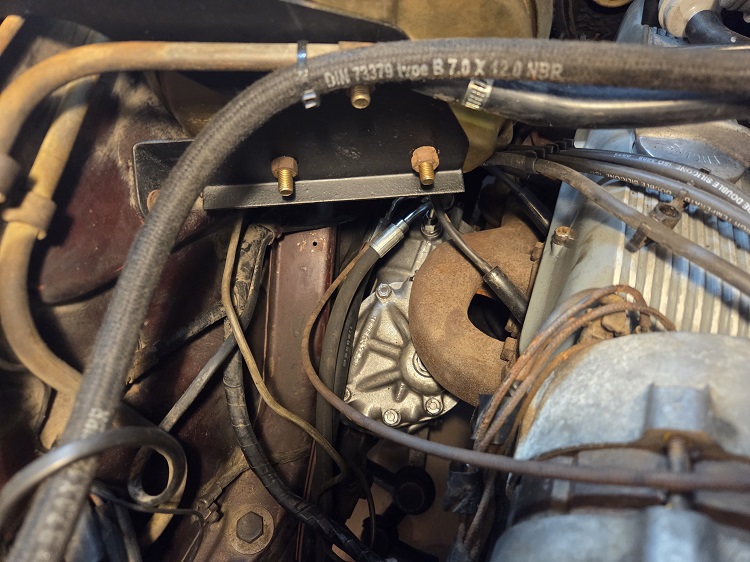
The Dowty seals between the hoses and Hydrosteer box were replaced. It's a special seal that looks like a steel crush washer but actually has a rubber inner seal that is squished when the banjo bolts are tightened. The rubber tends to dry out or crack as was in my case and leaks. The fluid reservior was also removed to be cleaned and repainted in satin black.
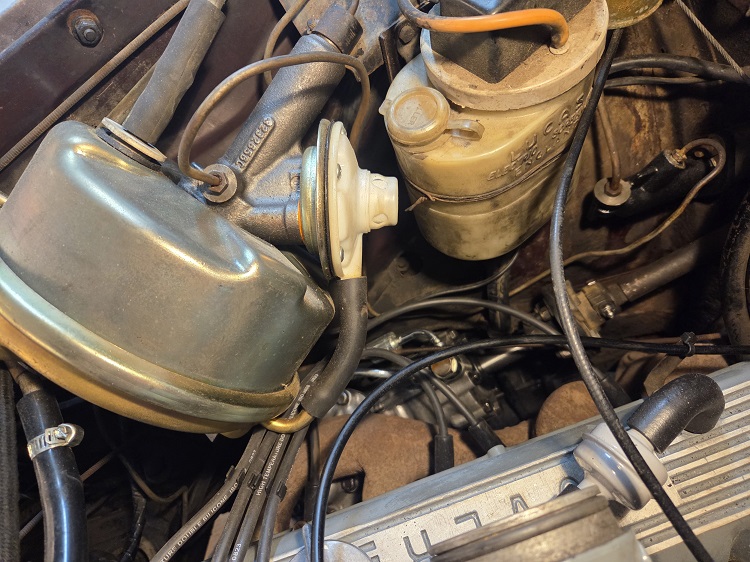
The brakes were all completely overhauled. The original booster was removed from the car when I acquired it so I had to study the service manual diagrams and pictures online to figure out the missing brake line and vacuum hose routing since this was my only V8 Rover so I had nothing to look at for comparison. All the master and slave cylinders, brake line hoses, and drum shoes were replaced with new ones from JR Wadhams. I already had new front calipers and shoes that the previous owner had acquired for this car but never installed, but I had to replace both front rotors with new ones from JR Wadhams before finishing because the original rotors had extensive rust and were badly scored.
Replacing the front rotors not as easy as on some other vehicles, but not too bad. The process requires removing the wheel hub and rotor assembly off the spindle. The grease cap is first removed to expose the hub nut to remove, and then the rotor and hub assembly slide off the spindle. Then on a workbench, the rotor can be unbolted from the hub and replaced. I had to use an impact driver to loosen the bolts attaching the rotor to the hub. Before removing the hub nut, I score a mark on it to locate where it was before when reassembling and then check again that the hub is not too loose or tight.
The driveshaft was originally out of the car when I acquired it and I think it is because Kent originally transported the car with a dolly. When I had the engine running, I tested the transmission for basic forward and reverse functionality before reinstalling the driveshaft. The rubber carriage bushings for the carriage that supports the u-joint between the two shaft pieces were replaced with new reproductions from JR Wadhams.