Crosley 168 Restoration Notes
Return to Home
Return to Resources
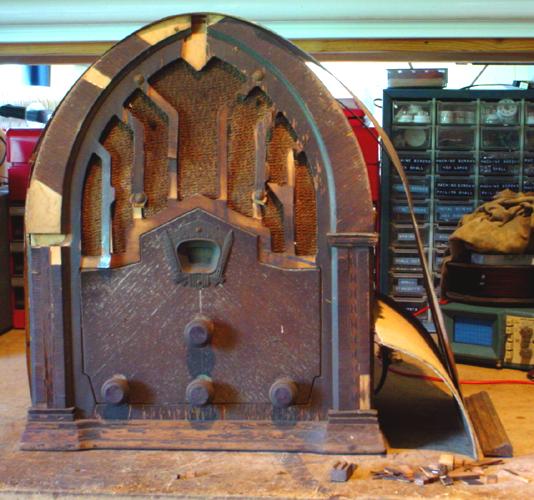
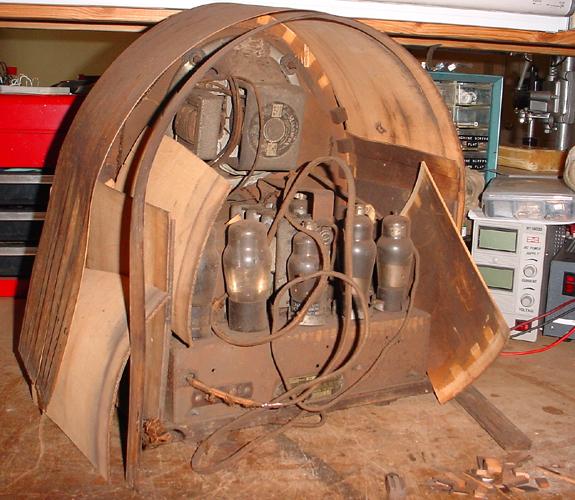
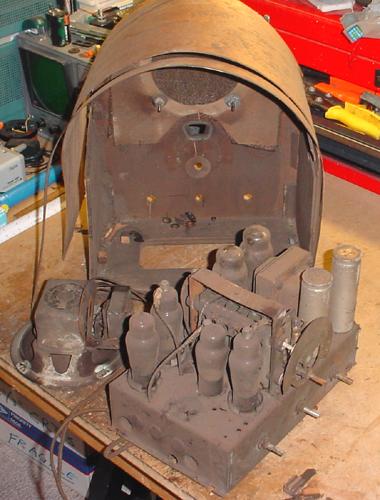
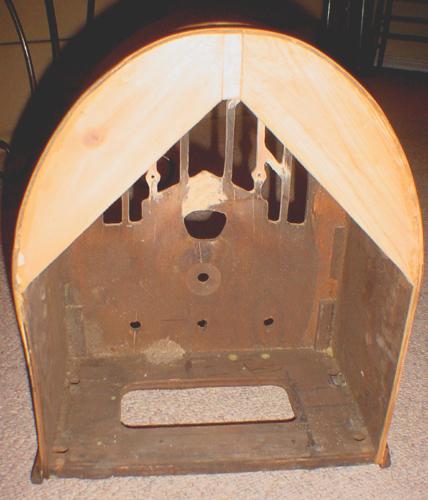
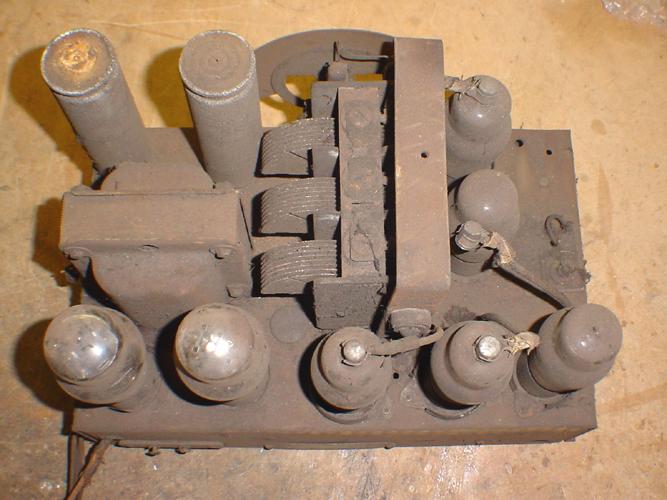
As shown in the pictures, the cabinet literally fell apart. The front of the cabinet was bent back due to the weight of the speaker mounted on it. The wood supporting the arch broke into three larger pieces. Bits and pieces of veneer fell off the front. The speaker grillwork was in bad shape upon purchase so I expected to replace it anyway. The chassis upon first glance appears to be a bucket of rust and all the tubes were covered in grime.
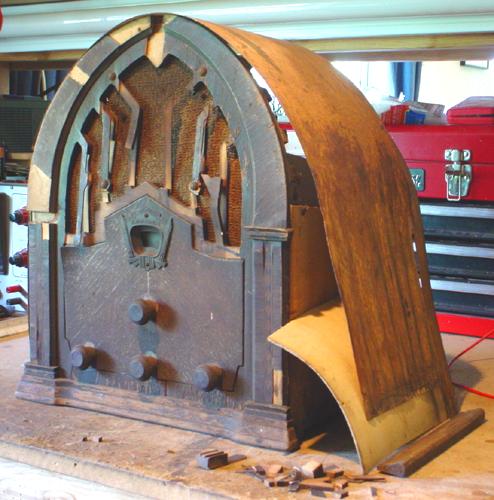
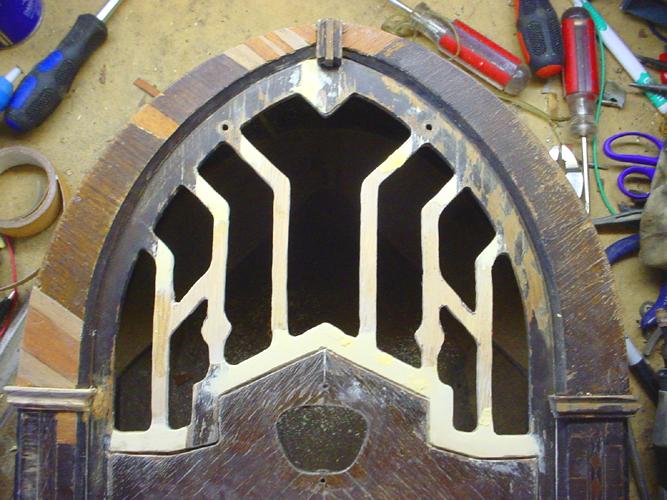
I decided to first take on the worst part of the radio: the cabinet. The first step was to repair the arch, which was done by removing the arch veneer and supports from the rest of the cabinet and rebuilding it completely. Below is a picture of the dismantled cabinet.
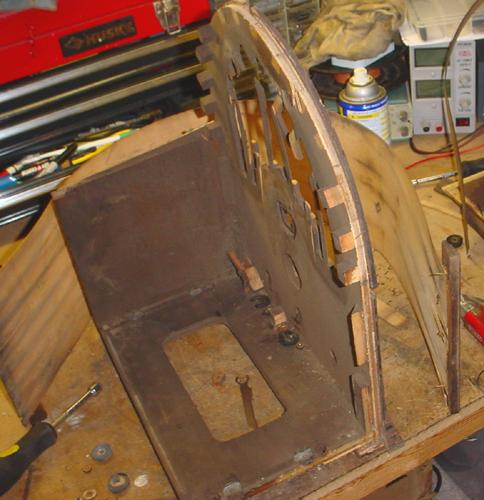
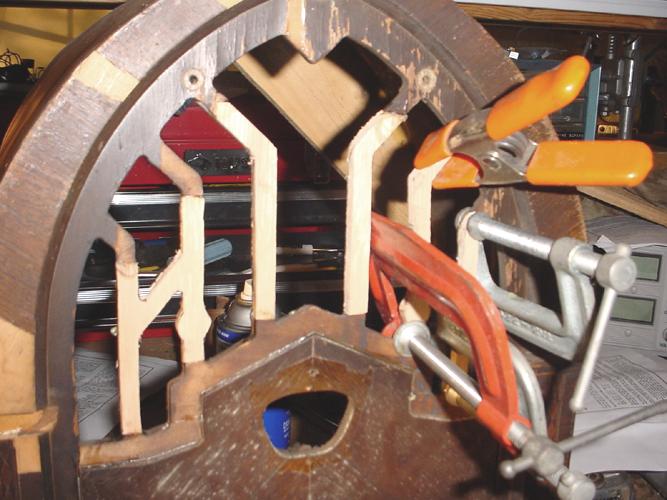
I wanted to use as much of the original wood as possible even if it meant piecing together a jigsaw puzzle. The three large chunks of wood that made up the arch support were glued and nailed back onto the rest of the cabinet. The nails used were small thin ones about a half-inch in length. Moreover, the arch had a piece of wood in the back that was missing and this piece of wood helped shape and strengthen the arch. I fabricated a new arch support for the rear as shown below.
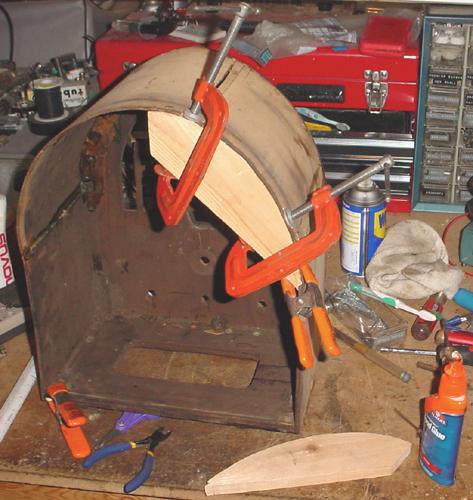
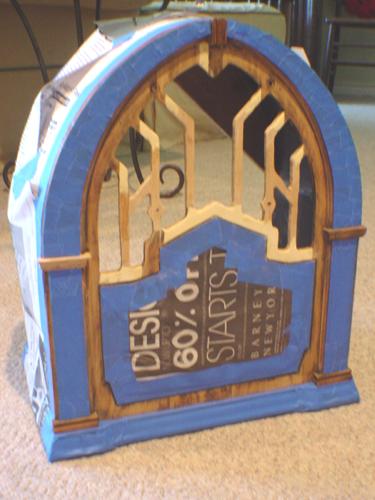
The arch veneer was not put on the radio until the end because it was so dry and fragile. The next step was to repair the speaker grillwork. The entire original grille had to be replaced because nothing was salvageable. The original wood was composed of several layers and most of these layers were missing, which made the grille weak in several places. Other parts of the grille were either warped beyond repair or missing. I took some pieces of the original grille to make an outline on a new piece of oak wood normally used for kitchen cabinet siding. The outline was cut out using a band saw then sanded down. The original grille was replaced with the new cutouts as shown in the following pictures. The grille required a good amount of gluing, clamping, and time.

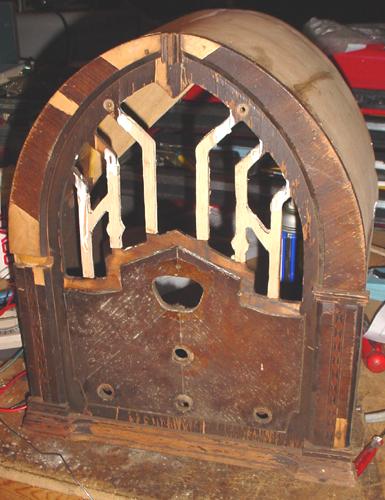
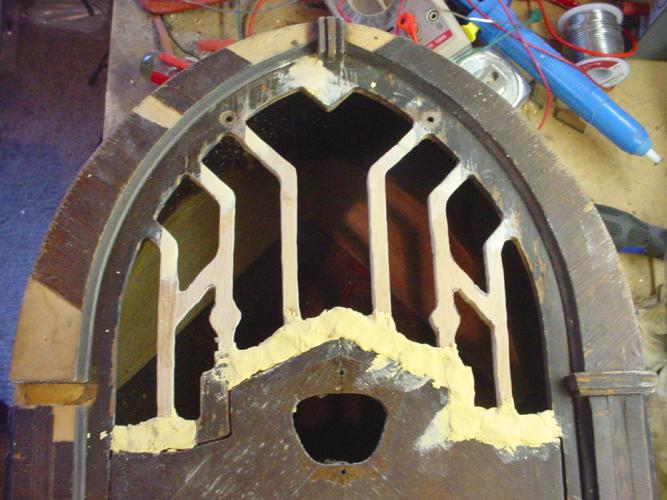
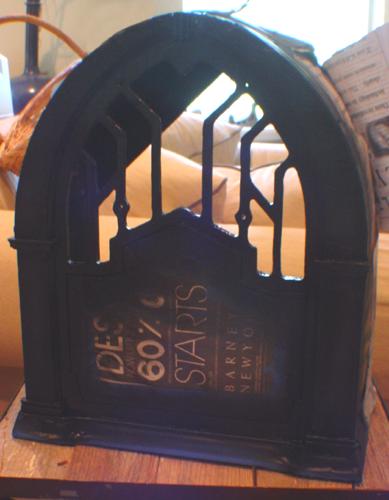
Over the years, I have observed different paint schemes on Crosley radios of the same model. My model 167 clearly had black paint on the grillwork before it was repainted unlike most 167 examples seen online. I decided to paint the grillwork black on my 168, although most other 168 models used stained veneer on the grille. Since the grille would be painted black, I used wood filler to smoothen out the grillwork as shown in the following pictures. Also new veneer was inserted in place of the missing pieces.
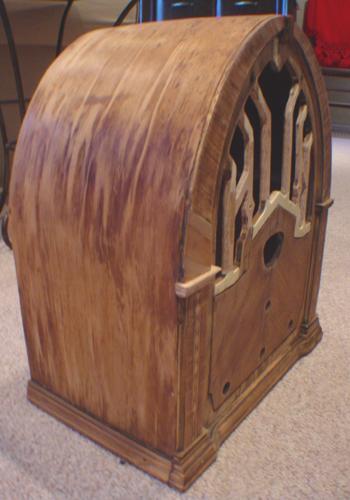
Finally the last repair for the cabinet was to add the veneer back on the arch. The original veneer was warped and wavy. I glued the entire arch then slapped on the veneer. I was unable to press out the wavy parts of the veneer while clamping it onto the arch support so the results came out a bit disappointing. Overall, the cabinet looks a heck lot better than when it first arrived in the mail, so that thought was comforting. All of the original wood was stripped and sanded in preparation for painting and refinishing. Below are pictures of the cabinet after stripping and ready for refinishing.
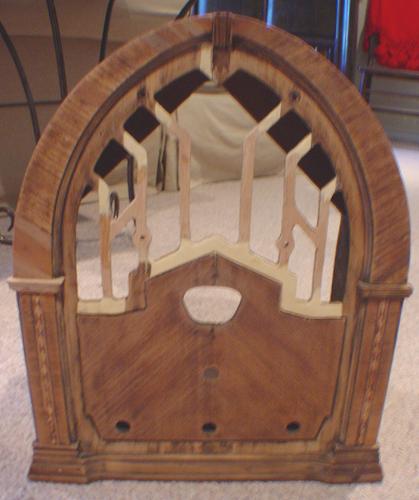
The areas that would be stained were masked off so the trim and grillwork could be spray painted black. Also the inside of the cabinet was painted black to hide all the visible repairs and improve the appearance of the cabinet. The painting process is shown below. The grille came out pretty good in the end.
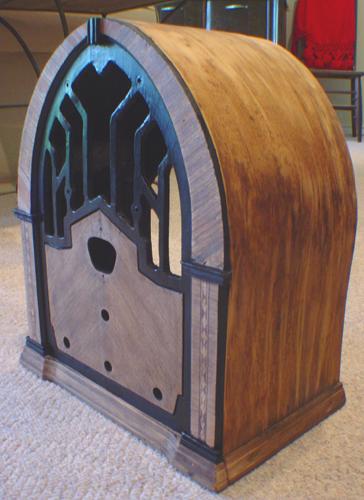

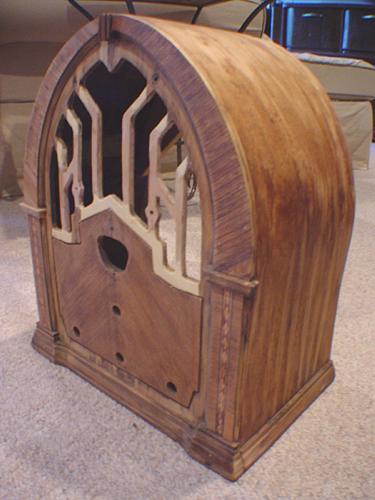
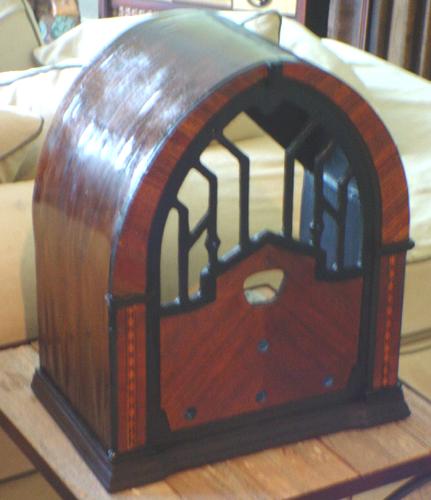
About two months has passed since the restoration process began, but the cabinet would finally see some refinishing. The arch veneer and the base were stained using dark walnut, and the front veneer with golden oak. After a day for the stain to dry, a satin polyurethane finish was sprayed on the cabinet about three times. The cabinet came out looking great as shown in the following picture.
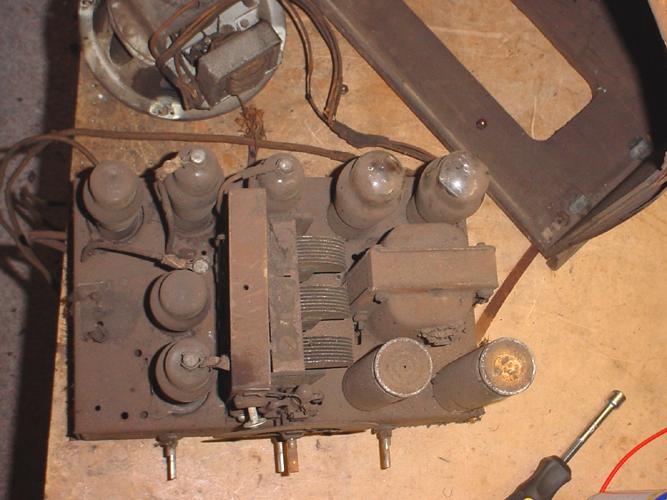
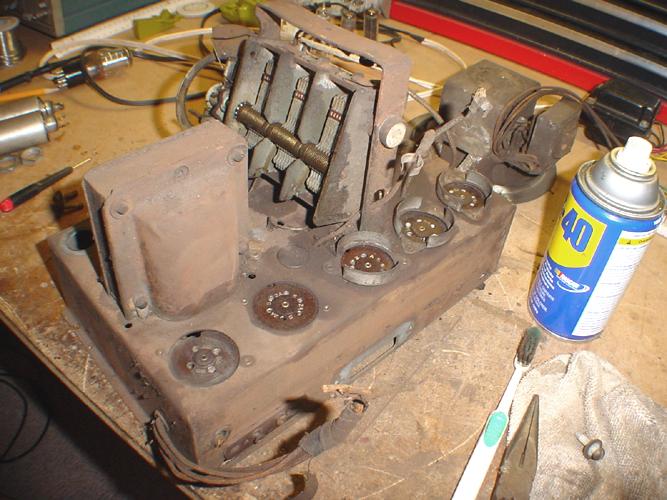
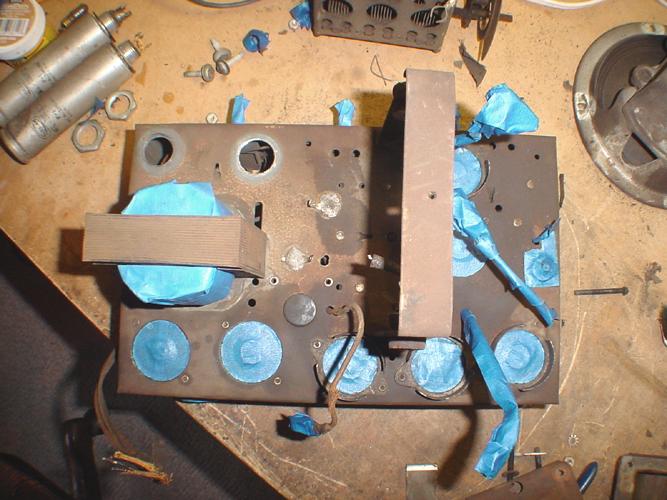
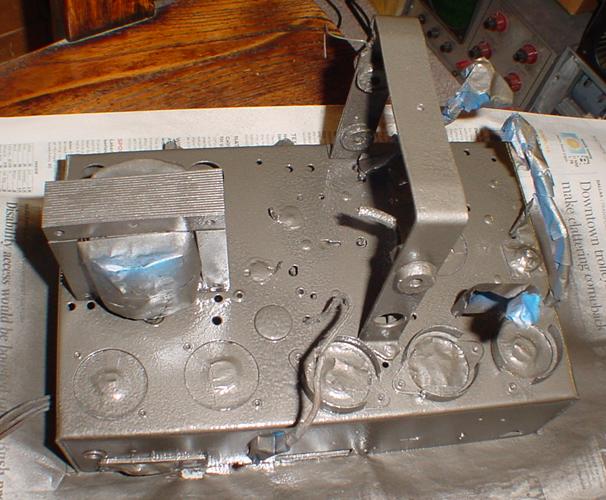
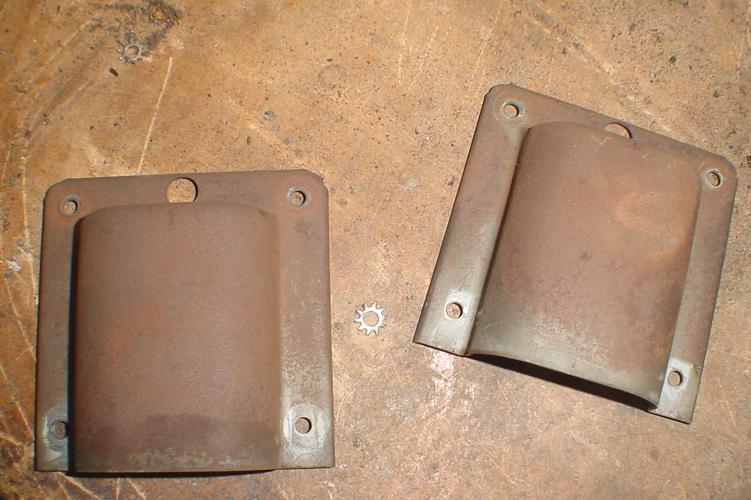
Now the next step was to restore the chassis that was completely covered in rust and soot. The tubes were pulled out, cleaned with a wet cloth, and all but one tube tested good. The only tube that failed was the one with the grid cap broken off. I attempted to clean the chassis with some WD40 but the entire surface of the chassis was rusted so I opted to spray paint the chassis. The three-gang tuning capacitor was carefully removed from the chassis. All the wires leading to the tuner were rubber so they were clipped because I would replace them with cloth wire. Also the transformer covers and electrolytic capacitors were removed. The remaining parts including tube sockets that were not to be painted were covered with masking tape. From prior experience of repainting badly rusted chassis, I decided to go with a hammered dark gray paint rather than flat steel gray paint. The repainted chassis came out looking much better and the progress is shown below.
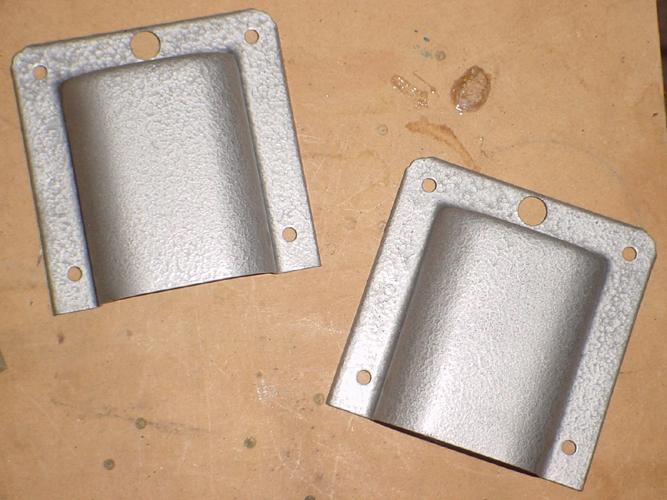
The transformer covers were painted with a lighter hammered gray paint as shown below.
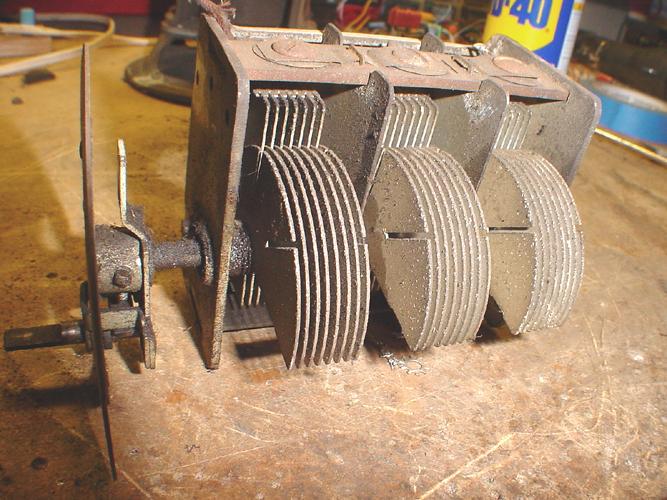
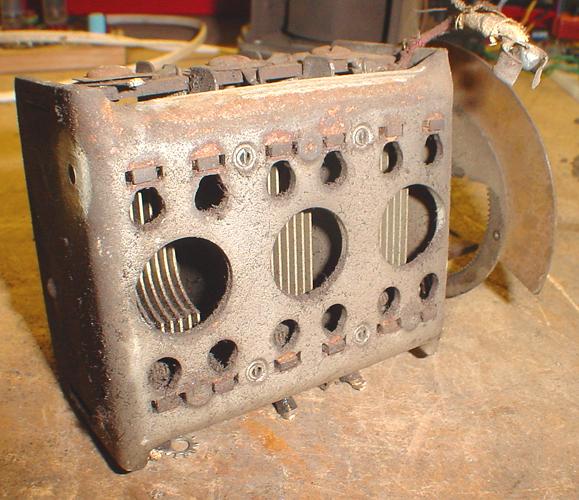
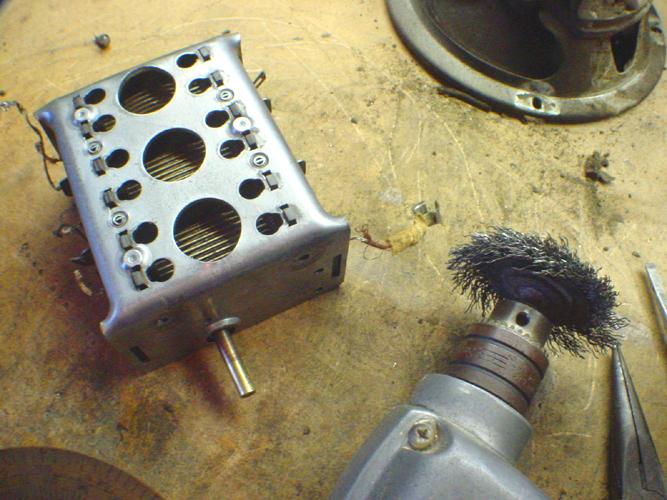
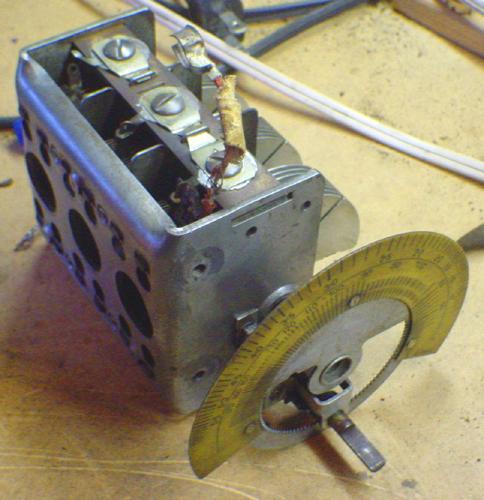
The tuning capacitor had rust and oxidization everywhere. WD40 and rubbing with cloth did little to remove the rust. For the first time, I decided to try to scrape off the rust using a steel wire drill bit. I never attempted this before with the fear that unsightly scratch marks would be visible, but the results were astounding. The speaker was cleaned in the same manner. Before and after pictures of the tuner are shown below.
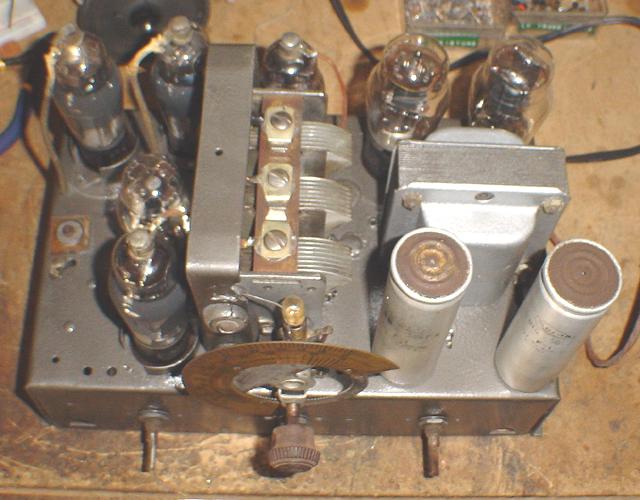
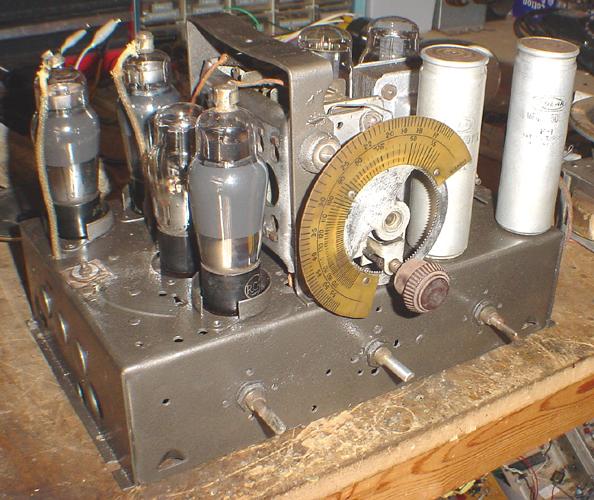
All the components and tubes were put back on the chassis and it looks much better now. The following pictures show the final result of the cosmetic repairs on the chassis.
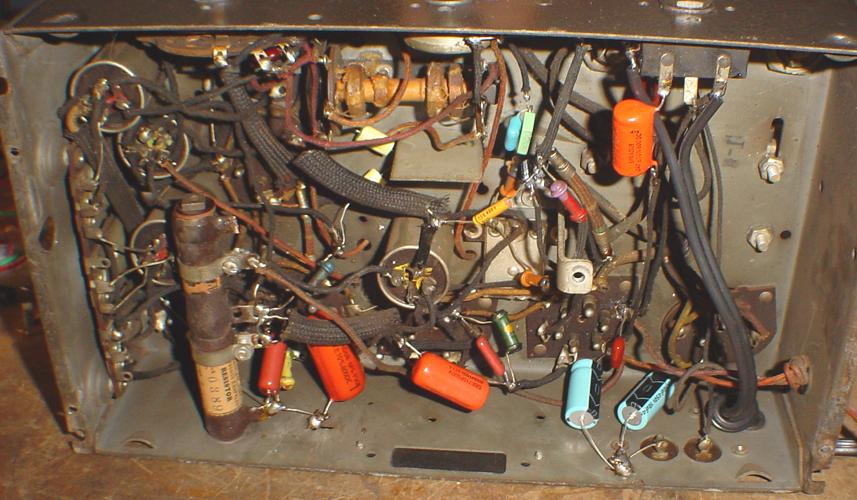
"Wait a minute," you may wonder, "the electronics have not exactly been repaired yet!" I am getting to that now. The two electrolytic cans were reinserted on the chassis for cosmetic reasons. Rather than restuffing the old cans, the new electrolytic capacitors were placed inside the chassis. All the paper capacitors were replaced with their modern equivalents. My 168 appears to have been repaired in the late 1930s because some paper capacitors and power resistors were replaced with those typical of the late thirties. Apparently Crosley used several two-in-one paper capacitors that were confusing because the common terminal could be either a lug at the center body of the capacitor or one of the end wires. Whoever repaired the radio in the late thirties replaced one of the two-in-ones slightly incorrectly that the radio would still work but not as well. I followed the schematic carefully despite the fact the schematic was small and difficult to decipher. Below are before and after pictures of the chassis underside.

The radio is a 7-tube superheterodyne with two I.F. amplifier stages. Three 58 tubes are used for the mixer and two I.F. stages. Before the pentagrid tube, the I.F. frequency was provided to the first 58 via its cathode by a 56 in a separate oscillator. The detector and preamplifier uses a 2A6, followed by a 2A5 audio output tube. All the filaments are connected in parallel, which is typical for transformer-powered radios. I did not have another 58 to replace the bad one so a whole I.F. stage was skipped by connecting the first I.F. output wire to the grid cap of the second I.F. tube. The tube in the first I.F. was left unplugged. The radio worked very well with a six-foot antenna and picked up several stations. Imagine how well it would work with the extra I.F. amplification! I did not have tube shields for the tubes at this time of testing so aluminum foil was wrapped around each tube and grounded to the chassis with alligator clips.
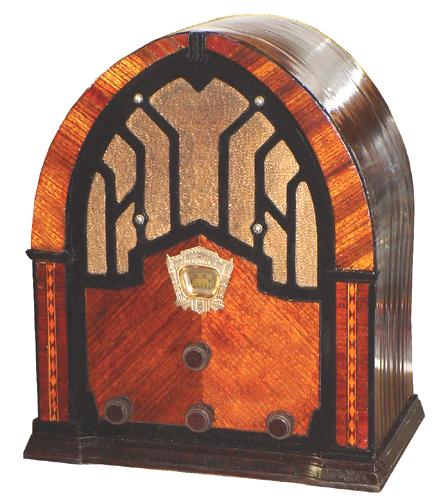
Finally the moment we all have been waiting for: the final product. The original grille cloth was in good shape with no tears so it was put back in the cabinet and the speaker was mounted. The speaker wires were replaced with new cloth wire. The chassis slid in the cabinet perfectly for the first time in months. The dial escutcheon was polished with Brasso. The knobs were cleaned and polished. The final product is this Crosley 168 below.
I collect radios mainly for the enjoyment of resurrecting a radio rather than the listening pleasure. This Crosley was an unique restoration experience. I have learned my lesson to never buy another radio in bad shape off ebay without the ability to inspect the radio in person. For the total purchase cost, I would not have ever bought a radio in such bad condition like this. But hey, another radio inches away from the dumpster was saved.
Back to Top