1953 Rover P4 75
October 2018 - Exhaust header, engine start up and fender work
Return to Home
Return to Resources
Return to Rover P4 page
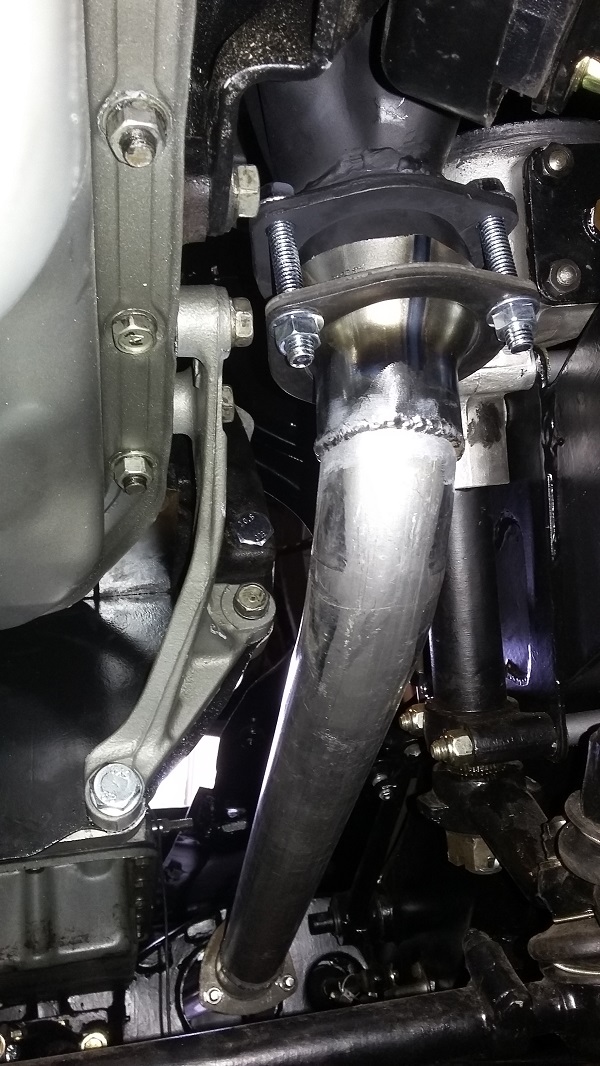
Exhaust header
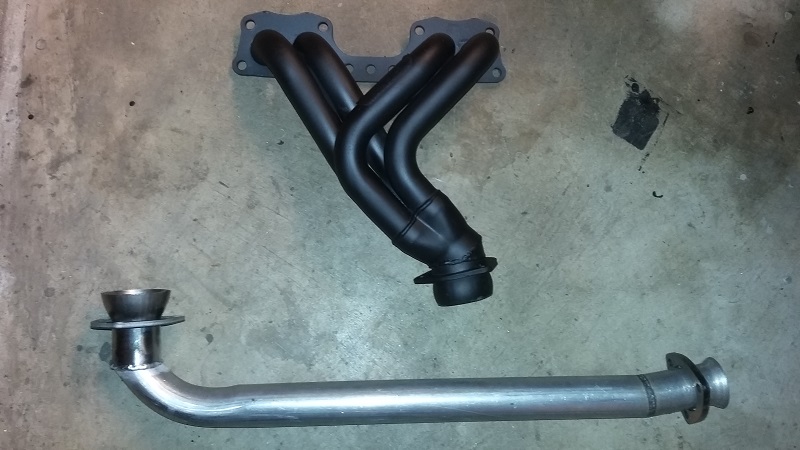
New Toyota 22R exhaust header from Hedmann Hedders made in the USA, part number 39400. The angle of the header outlet hits the steering box so I modified the angle to point downward like the original Rover engine header did. I'm not terribly worried about the "performance" degradation I'm inflicting on myself here. The first section of the P4 exhaust pipe kit from the UK was also modified to shorten the length since the header outlet is much lower on a 22R compared to the original Rover manifold. One other thing to note about the Hedmann header, it has a protective paint coating to prevent rust and is not intended to survive exhaust temperatures. The negative product reviews I saw on the Hedmann header was due to folks running the header with the factory paint. They'd complain about burning off the paint and lamenting about their the header rusting. I took the extra step to wire wheel, sand blast and repaint the header with a high temperature black exhaust enamel spray paint. I don't have much hope of the new coating lasting a very long time, but it should last much longer than the factory coating.
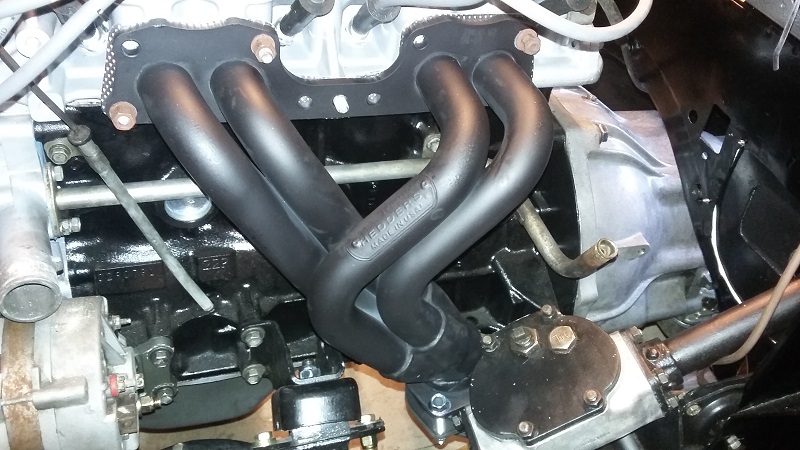
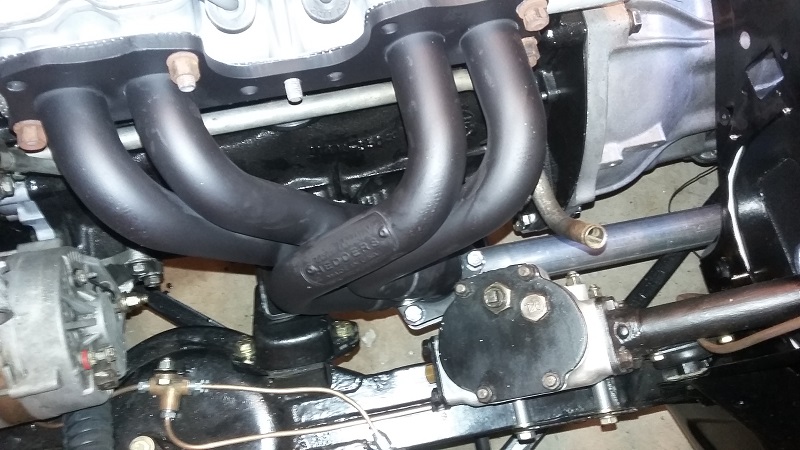
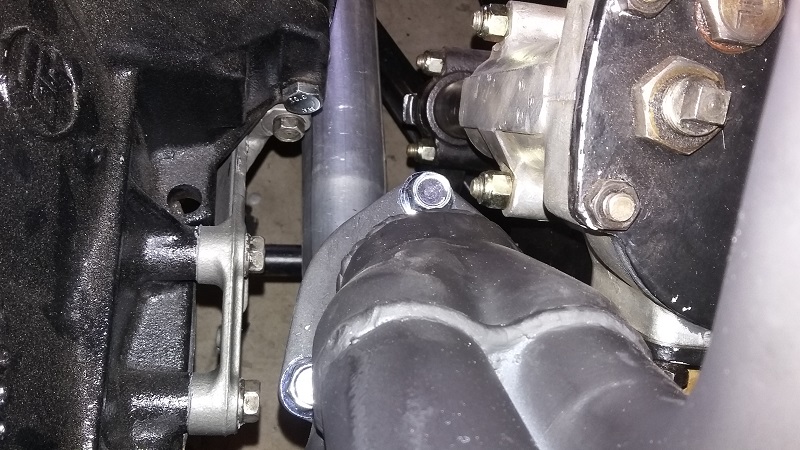
A bit of a tight fit but the header and exhaust clear the steering components with somewhat better clearance compared to before.
Heater
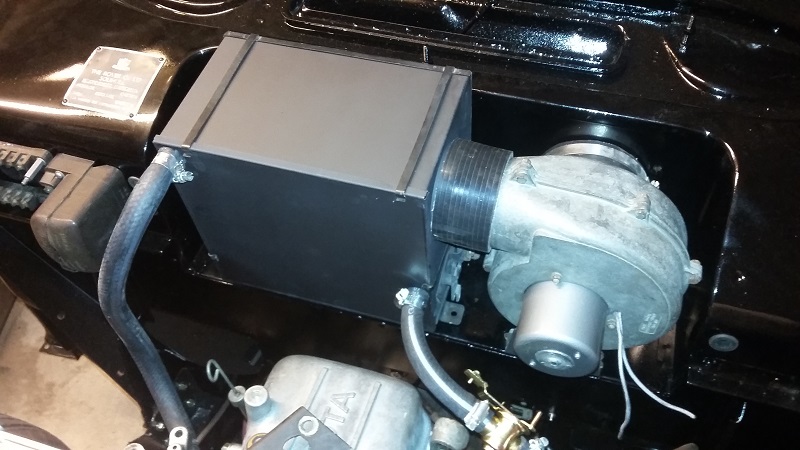
Cleaned up and painted the heater core box and blower fan motor housing. The rubber couplers on the blower fan inlet and outlets are silicone hoses normally used for cold air intake modifications. I found brand new ones available on eBay with the exact inner diameter to perfectly match the blower inlet (4 inches) and outlet (3.25 inches). The previous owner tried to do a replacement using PVC pipe rubber couplers but they were not the correct diameter and fit poorly.
Engine start up
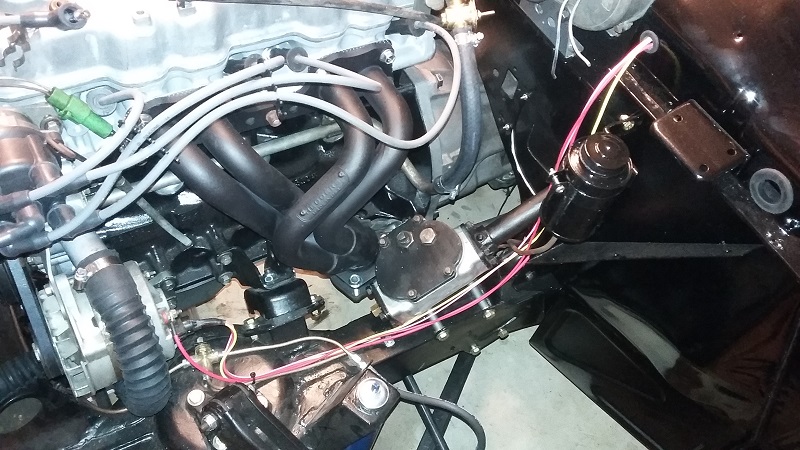
I did not save any of the original P4 wiring because it was badly hacked up by the previous owner and also was obviously not designed for a Toyota 22R. I ran all new wiring based on the 1982 Toyota Celica wiring diagram with many simplifications and modifications. Since the battery is still located under the rear seat a good 6 feet away from the starter motor, I chose to use 1 gauge battery wire and soldered on eye terminals using a propane torch and solder slugs that you can find on eBay. This ensures there is no significant voltage drop from the battery to the starter due to wire resistance when passing hundreds of amps through it.
A new fuse panel was mounted on the inside next to the steering wheel for easy access and cleaner conditions. I mounted the original fuse block, wire terminal blocks and Lucas generator regulator to the firewall just to maintain the original appearance. Only a few of the terminal block screws will actually be used, but most of the wiring will be direct point to point from the controls or indicators to the actuators or sensor respectively.
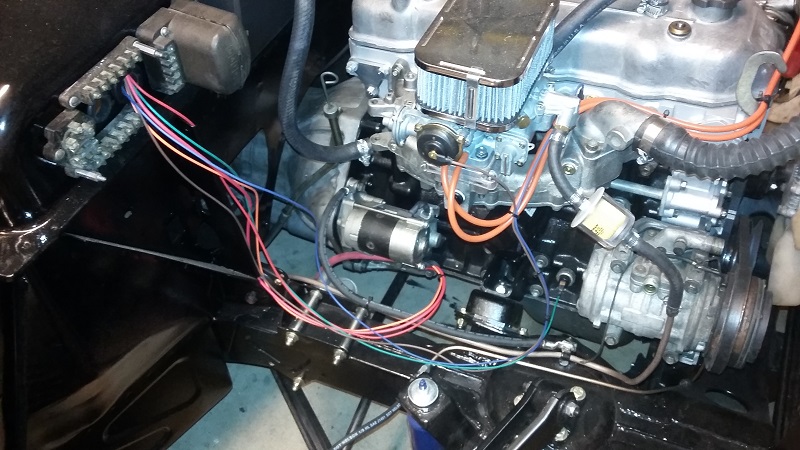
I installed a new electric fuel pump (not pictured) in the same spot that the original P4 pump would have been located at the right of the trunk door. The Weber 32/36 is sensitive to fuel pressure and only requires a few psi of fuel pressure. I chose a Carter P90091 fuel pump that supplies 2.5-4 psi for this application. The previous owner had used a Spectra Premium SP8012 that pushed 9 psi instead of using a mechanical pump on the Toyota 22R. Using an electric pump makes sense on a P4 because there is no return fuel line for the mechanical pump to prevent vapor lock issues. I had noticed during engine tear down a few months earlier that the original Toyota carburetor appeared to be running way too rich because of the sooty deposits on the 22R head after removal. It was most likely because the SP8012 produced too much pressure that it unseated the carburetor needle and was gushing gas into the engine.
A small local radiator shop pressure tested and cleaned up the original P4 radiator for me. They also resized the inlet and outlets to mate to Toyota 22R radiator hoses. The lower radiator hose is a Gates 25484 flexible 1.5" ID 25" length. The upper radiator hose is a Gates 25252 flexible 1.25" ID 15" length.
With the wiring, fuel pump and radiator in place, I was able to test several things and remove many uncertanities and doubts.
- The previous owner had used a separate starter solenoid, which was puzzling because a 22R starter has a solenoid built in so I wasn't sure if there was a problem with it. Not having to mount a discrete starter solenoid on the firewall somewhere is a nice bonus for cleaning up the engine compartment. The engine cranked so the original starter and built-in solenoid was good!
- The engine was almost able to start on the first try. I fiddled with distributor until ignition timing was running at the stock 1982 22R spec of 8 degrees BTDC. At this point the engine starts right up and runs very smooth. This also confirms the ignition coil and module that I reused is good and was hooked up correctly. Replacing the ignition module with a Toyota equivalent is surprisingly very expensive compared to some run-of-the-mill Motorcraft, GM or Ford ignition module so I was glad to not have to replace it.
- Warming up the engine allowed me to do the final valve lash adjustments.
- With a running engine, I shifted the A43D transmission through all the gear selectors without the driveshaft attached just to sanity check that the transmission is functional. This was one of my biggest worries in the entire rebuild because there is no way to inexpensively bench test an automatic transmission. If I had discovered a problem then the whole experience would have devolved into a nightmare by having to yank the whole engine and transmission. It might be possible to drop the transmission without taking out the engine, but I don't want to ever find out because easy servicability is not exactly a consideration with a non-original drivetrain. Fortunately, I ran through all the gears and watched the yoke rotate so that was good news at least for reverse, first and second gears. Third gear and overdrive still remain to be tested at higher speeds on the road. If the first 2 forward gears are of any indication, these remaining gears should not have issues.
Front fenders (wings) work
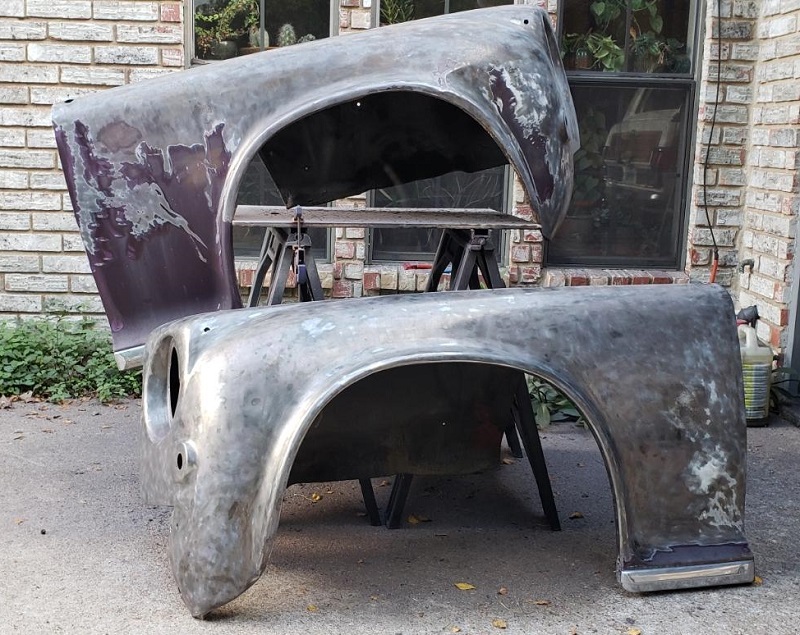
Front fenders were wire wheeled and getting ready for sand blasting. It was a rainy October in central Texas so not a lot of progress was made on the fenders or other parts requiring work outdoors.