Persistence of Vision Propeller Clocks
Return to Home
Return to Projects
Version 1 (January 2005)
The persistence of vision (POV) propeller clock is one of the most neat projects to build using a PIC or some other low cost microcontroller. The first design of the clock was mainly a clone of Bob Blick's propeller clock along with a few modifications of mine. I used a PIC16F84A microcontroller. I'd have to admit that the programming end of things was more difficult than building the clock itself in the beginning. I originally built over five homemade programmers with various software available over the internet, all of which failed to program the PIC. I finally gave up and bought a kit programmer that was not very good either but after fiddling with the software, I managed to program a PIC successfully.
One major modification of Bob Blick's design is providing power to the spinning assembly. The original design took the power off the spinning armature of a DC motor and converted it to striaght DC for the clock. I have tried this modification on two motors and the results were not very satisfactory; either it resulted the motor rattling a little or it did not work efficiently. I also learned that the original design had a .047F (FARAD) capacitor for memory and I did not have a such capacitor on hand, so I decided to make some modifications. Instead, I put a rubber plate above an unmodified DC motor for insulation and a washer on top. The metal case of the motor is connected to ground, and the washer was connected to 5V. The spinning board obtains the 5V through a sliding contact to the washer, and ground through the spinning center of the motor that is also part of the grounded body. This modification worked very well, but there was the problem of providing a display reference point for the clock. The original design obtains the reference point from one of the terminals on the armature. I put a small notch on the outer end of the washer and put a pick-up wire on the spinning board to pick up the pulse from the notch. This worked but I was not satisfied by the display occassionally wobbling because the flexible wire does not always keep its position after it hits the notch and also this caused a soft clicking sound that was irritating. Therefore, I replaced the wire with an infrared sensor and installed an infrared LED on the side of the motor. One advantage from this overall modification is the fact you can provide variable speeds on the motor, since the power to the motor is completely independent of the power to the clock. You could turn off the motor and still set the clock, which omitted the need of a .047F memory capacitor. Below is a schematic of my clock:
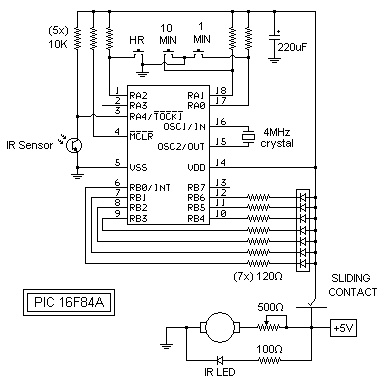
The program for the PIC can be found at Bob Blick's website, the filename is MCLOCK8.HEX and is located on the Propeller Clock page in the Technical Information and Projects section.
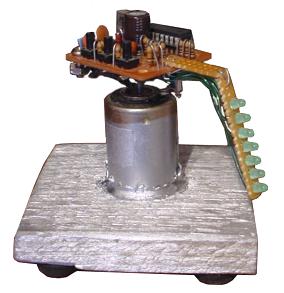
Front of clock
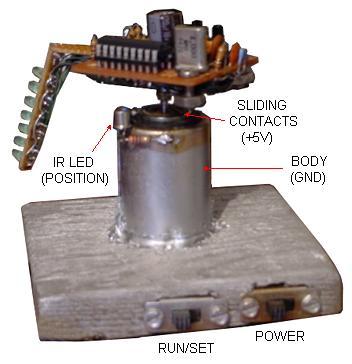
Rear of clock
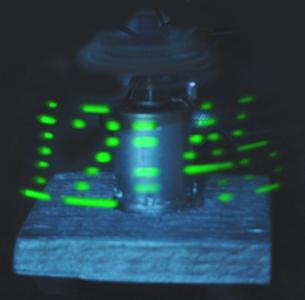
Clock during operation
Version 2 (January 2005)
I decided to rebuild the original propeller clock using higher intensity 5mm LEDs. However, the original propeller clock had some problems with the sliding contact being eaten away due to friction over time. Also the board was built a year before the clock was actually up and running so there were several modifications on the wiring, which resulted in some brittle connections and intermittent operation so I just needed to build a new one. I reused some parts from the original clock including the PIC and also used a revised code somewhere on the internet to add the seconds to the display.
I found a nice motor in my junk pile that probably was used in an old laserdisc player if I remember correctly. I decided to build this clock using the classic Bob Blick style, obtaining power from the armature of the motor. I was fortunate to pull this off with this motor, since all other previous motors failed to run smoothly when I was building the original clock. I used a ball bearing from a VCR head to hold the top end of the motor in place, plus some other parts from cassette tape players. Since this clock does not obtain power independently from the motor like the original, a .047F capacitor was absolutely necessary to keep the PIC powered up so you can set the time. However, this was not easy for me to obtain, so I replaced it with a miniature 3V lithium watch battery, which works nicely. I also made a few modifications to the original schematic on Bob Blick's website; I added a zener to regulate the voltage from the armature of the motor to 5V for the PIC so the motor could run at higher speeds with the clock having only 5V.
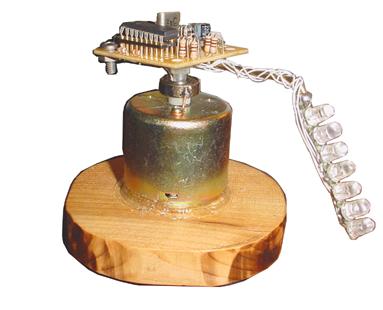
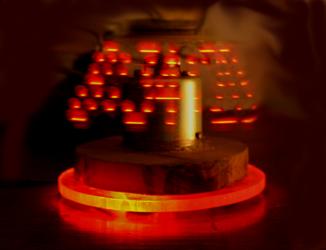
Version 3 (Summer 2006)
I built another propeller clock using smaller ultra-bright green 3mm LEDs. I had planned on making a clock using ultra-bright 5mm blue LEDs, but after it was built the digit display did not come out as expected. I thought that these brighter blue LEDs might result in sharper looking digits as opposed to my second one with the weaker "ultra-bright" red LEDs, but the digits appeared poorly out of focus. Disappointed by the results, I bought some 3mm ultra-bright green LEDs and changed out the blue LEDs with these. The results were much better with the digit displaying much sharper and crisper.
The circuit is pretty much identical to previous versions except for a few modifications. The second propeller clock used Bob Blick's method of obtaining power from the motor's armature. I didn't want to bother with the painful process of aligning the ball bearing on the top of the motor so the clock runs smoothly. I started to revisit my original plan in the first clock by supplying the spinning board constant power to eliminate the need of a memory capacitor or battery. Instead of a washer on top of the motor with a spring contact, I simply pulled out the armature out of another motor and put it on the shaft of an unmodified motor. Also, the brushes from the gutted motor was placed on top of the unmodified motor. For most DC motors, the shaft is not long enough for the armature and the plastic piece that connects the spinning board to the shaft. I used a cassette tape motor, which typically have long shafts because of the gear assembly for running tapes forward and reverse. Some cassette player motors runs the mechanisms via a belt, but some have a motor that drives the tapes directly via the gear assembly. The shaft from motors like these are about three-quarters of an inch, which is plenty for the entire armature and the connecting piece for the board. Below is a picture of how the brushes and armature are assembled on the unmodified cassette tape motor:
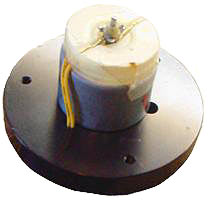
The circuit is basically the same as the second propeller clock with simple modifications; the power for the clock is fed through the armature so the clock has power while the motor is not running. There is no need for the memory capacitor or battery. Below is the schematic diagram:
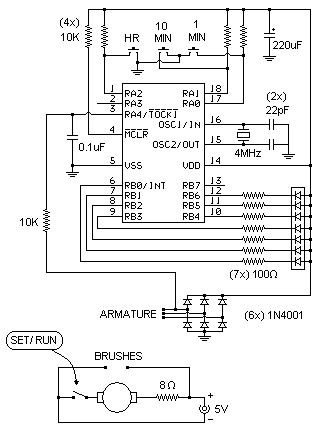
I hid the motor, the armature and brushes on the top inside some cedar wood. I drilled out the hole in a piece of cedar wood for the motor, then cut the outside about a half-inch thick using a band saw. I used a piece of black (painted) aluminum as the base for the clock. There is a very small red switch at the base that turns the motor on and off to set and run the time respectively.
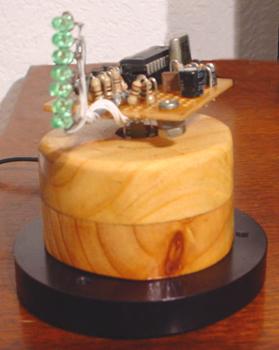
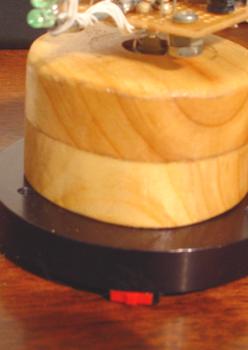
Notice the red switch at the bottom of the base for turning the motor on or off.
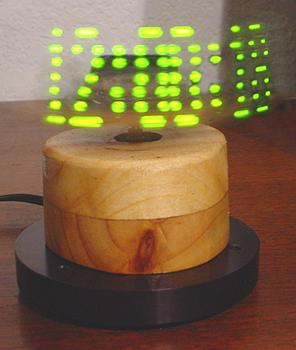
Version 4 (August 2014)
Interested in building a persistence of vision clock or display based on this version? Buy the Catahoula Technologies POV Display kit.
I decided to dust off this old classic project and bring some improvements from what I have learned from the older versions. The biggest problems with the first 3 versions I built many years ago is that none of them really lasted more than a year or two because the slip rings or brushes wear out and cease to conduct current for the spinning board. Even the brushes inside the DC motors wear out and they simply quit running. Also I used to have trouble programming PIC microcontrollers and not to mention that many of the code I'm used to for PICs were written in raw assembly code. No more!
I started out designing this new version with the intent of making it more reproducible and manufacturable for everyone else. That means some old habits of mine must die hard. I can no longer pick some random component from my junk pile, hand-wire everything on a protoboard, hot glue stuff together, and build an one-off propeller clock in less than a week with the expectation that anyone would be able to easily reproduce it from a simple schematic and some pictures. Also propeller clocks are electromechanical devices by nature and not everyone is interested in trying to figure out or deal with the mechanical aspect of the design.
The obvious solution to the DC motor problem is to use a brushless DC (BLDC) motor for quiet long-lasting operation. BLDC motors are commonplace in the quintessential PC fan that are everywhere and inexpensive. Unfortunately, trying to source a simple brushless DC motor by itself without any attachment to something else like fan blades, disk or CD drive turns out to not be as easy as I thought. I even considered the BLDC motors used in quadcopters, but those are designed for very high RPMs and require a separate motor controller that typically expects PWM. Furthermore, I did buy and play around with a quadcopter BLDC motor. It turns out that running a quadcopter BLDC motor at low RPM produces a high pitched whine, which is clearly unacceptable for a display that is not supposed to annoy everyone near it. In the end, I decided to use a 60x60mm PC fan as the motor and designed a base PCB around it.
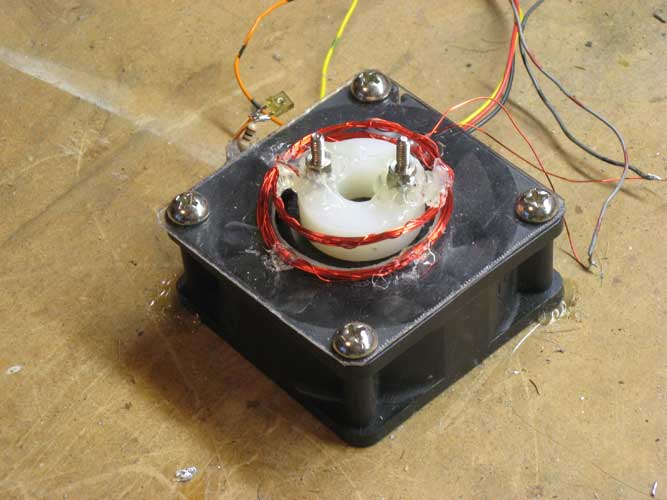
For power delivery to the spinning board, I wanted to avoid using slip rings or brushed contacts. The tried and true approach to wireless power transfer that many other propeller or POV display designs have used is a spinning air-core transformer. I have seen most designs use magnet wire handwound in a circle or in a helical coil structure. I thought it would be interesting to consider the possibility of having the coil printed on the PCB itself to save everyone the trouble of trying to source magnet wire and wind the coil themselves. After all, magnet wire is copper. PCB traces are copper. What's the difference? The only limitation of the PCB coil is that it is restricted to a planar spiral structure so it uses up more horizontal area compared to a helical coil for instance. However, since I decided to use a PC fan as the motor base, there's all that surface area for the fan that is useless, but perfect to try a PCB coil. I did not want anyone to have to deal with hacking up the PC fan to remove the outer frame and the fan blades for simplicity.
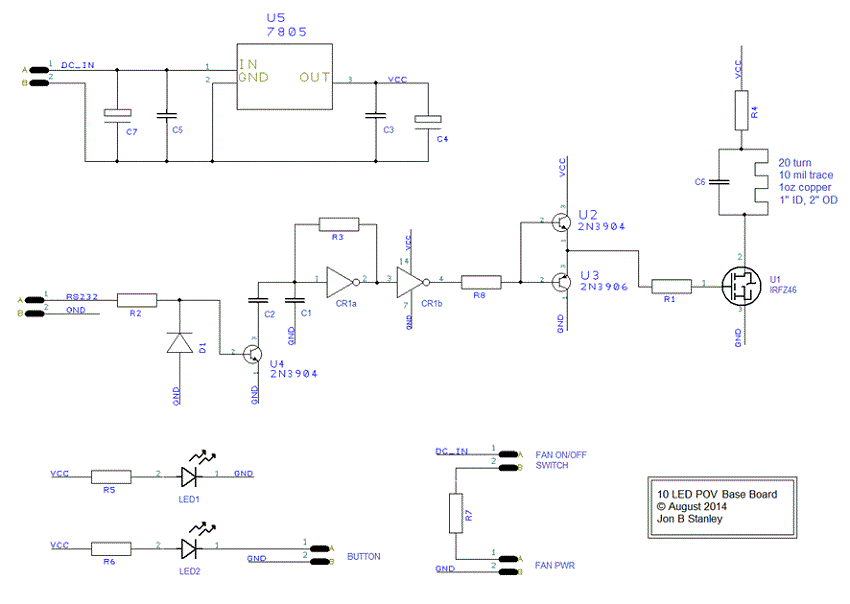
For the POV display, I decided to modernize a little and use an ATMega328 with the Arduino Uno bootloader and program it using Arduino code. Writing Arduino code in C code style is way easier than writing, deciphering, and debugging PIC assembly! Granted, I did not write most of the PIC assembly code for the first 3 versions, but they were not necessarily easy to understand and modify. Furthermore, the Arduino supports an UART so I was very interested in the idea of transmitting RS232 to the Arduino on the spinning POV board for all types of purposes including a live message board or possibly a pixel graphics display controlled by a PC or setting/resetting the time over RS232. Several POV display examples I have seen used an IR remote for changing display modes. To transmit messages, a radio like the Zigbee is typically used. I was more interested in something more basic and inexpensive so I looked into rolling my own RF transmitter/receiver since RS232 is very simple and only needs to be transmitted from the stationary base to a spinning board with an antenna at most a few inches away. While looking into the radio design details, I was worried about trying to detect a weak RF signal in the presence of a large interferer caused by the switching frequency of the air-core spinning transformer. I had my eureka moment when I realized that all I really care about is transmitting RS232 in one direction. That pesky transformer switching frequency noise could be made meaningful to send RS232 bits by shifting the frequency around! I designed a basic Frequency Shift Keying (FSK) design where a logic 0 or 1 is represented by 2 different transformer switching frequencies as shown in the diagram below. Note that the inverters are Schmitt buffers, which is required for oscillation due to the hysteresis on the input switching thresholds.
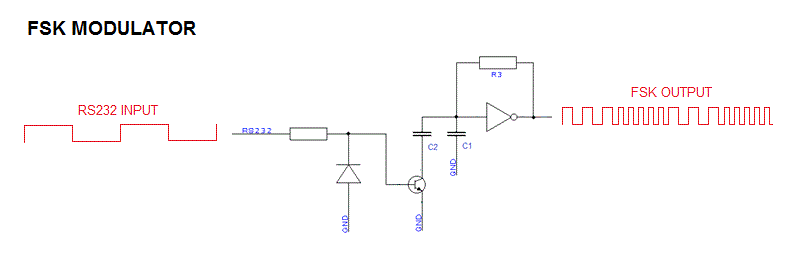
The FSK modulator circuit shown above will function fine with RS232 either in the standard signaling format (-3 to -15V low, +3V to +15V high) or TTL levels (0V low, +3.3V to +5V high). The diode at the base of the transistor clamps the base of the transistor to ground to prevent negative signal voltages from causing damage to the transistor. I used the Schmitt buffer oscillator instead of a 555 timer because I anticipated a possible need to switch the transformer coil at > 500KHz, which is beyond the capabilities of the 555 timer. Also cheaper 555 timers actually tend to be 100KHz versions.
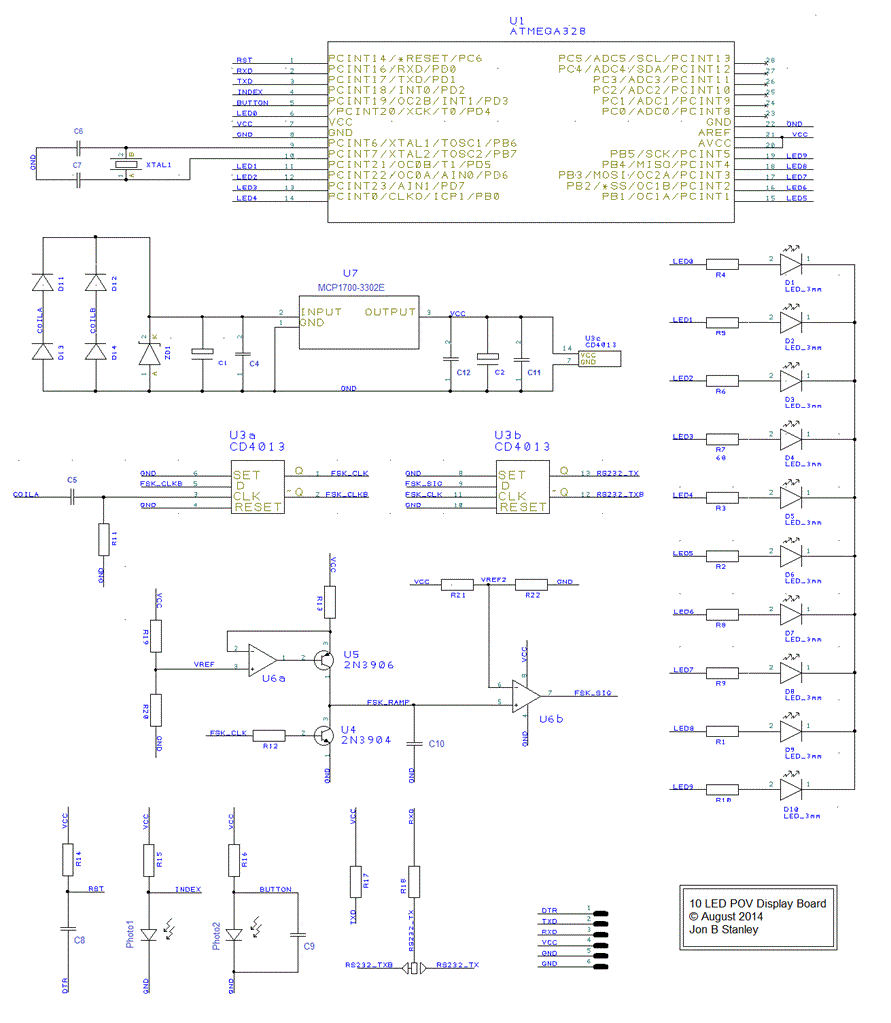
On the spinning board, the transformer secondary will pulse at the FSK frequency of the transformer primary and FSK is decoded with a simple slope detector. The transformer signal feeds into a CD4013 flip flop to generate a 50% duty cycle FSK clock signal since the voltage pulses from the transformer secondary is not 50% and it is critical to have a constant duty cycle for the slope detector to function correctly. The clock resets a ramp generator that uses a constant current source charging a capacitor using an op-amp and a PNP transistor to maintain a constant voltage across a resistor (R13 in the following diagram). If the FSK frequency is high then the capacitor has less time to charge so the final ramp voltage is lower compared to when the FSK frequency is low which gives the capacitor more time to charge to a higher voltage. An op-amp is used as a comparator to distinguish between the two different ramp voltages to produce a 0 or 1 that is stored by the 2nd CD4013 flip-flop. The following diagram illustrates the basic FSK slope detector circuit.
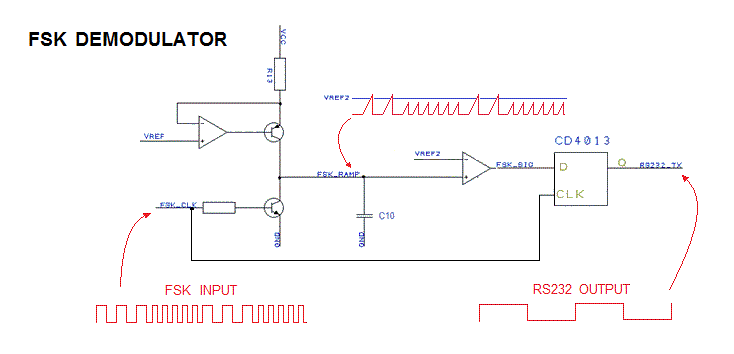
After tweaking a couple potentiometers on my prototype board to set the current source and comparator levels, I was able to decode a 20KHz FSK modulated clock signal produced by a function generator. Testing PC to PC serial communication with a serial terminal (PuTTY) was able to transmit up to 28800 baud without any observable errors. At 38400 baud, the jitter caused by the 4013 flip-flops being clocked by the FSK signal itself unsurprisingly caused occassional bit errors. The actual Arduino Uno UART was tested at 9600 baud without any observed errors. I wrote some Arduino code to allow typing in a serial terminal on a PC to be transmitted to the spinning POV board "live" and on the fly.
The final schematics of the overall POV display design are shown below. There is a base PCB that mounts on the PC fan and a POV display PCB along with a secondary transformer coil that mounts at the center of the fan blades.
Base PCB Schematic
POV Display PCB Schematic
Prototype Pictures
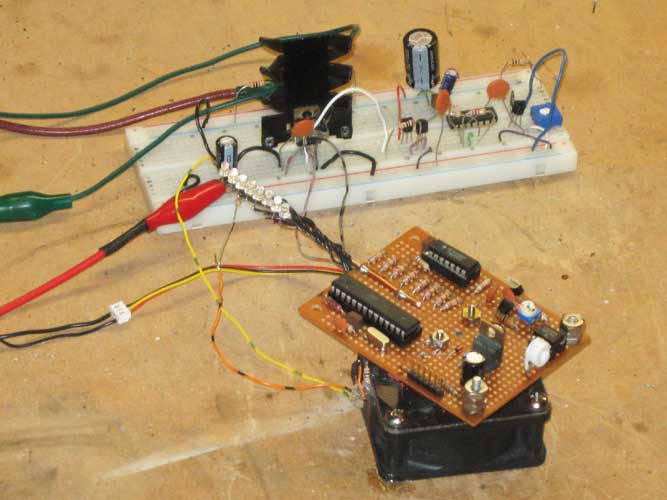
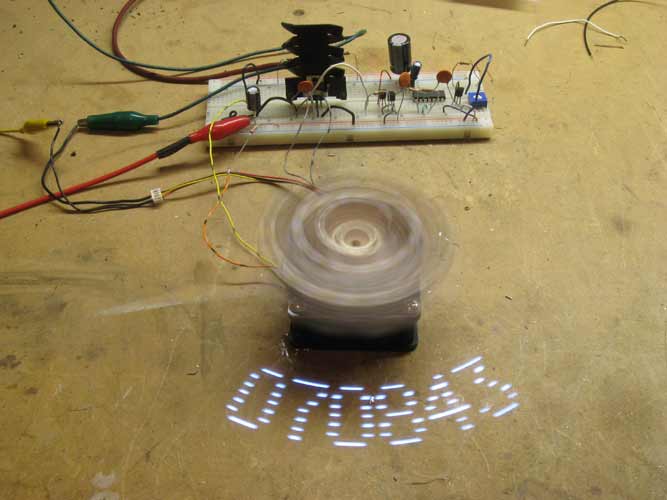
PCB Implementation Pictures
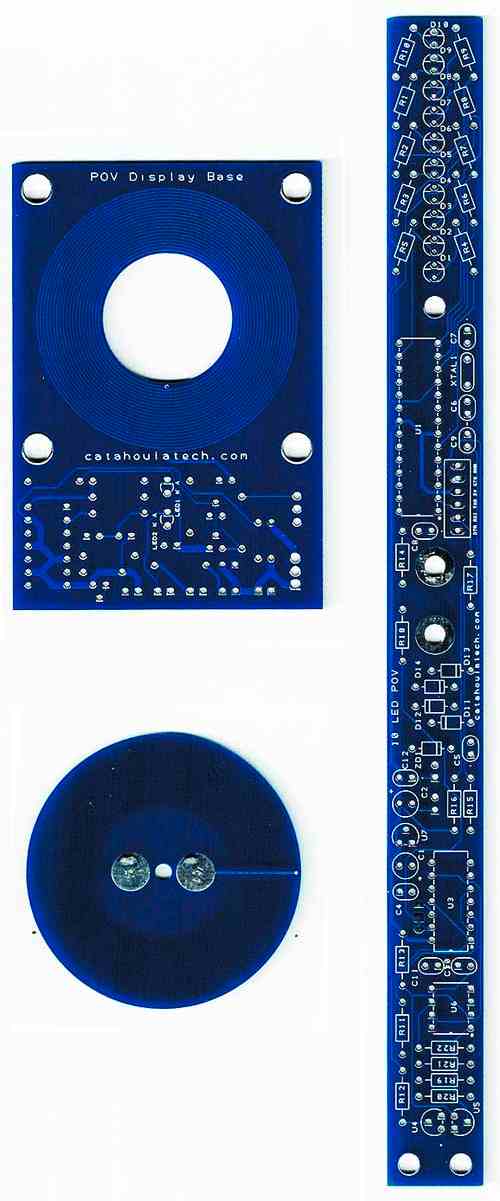
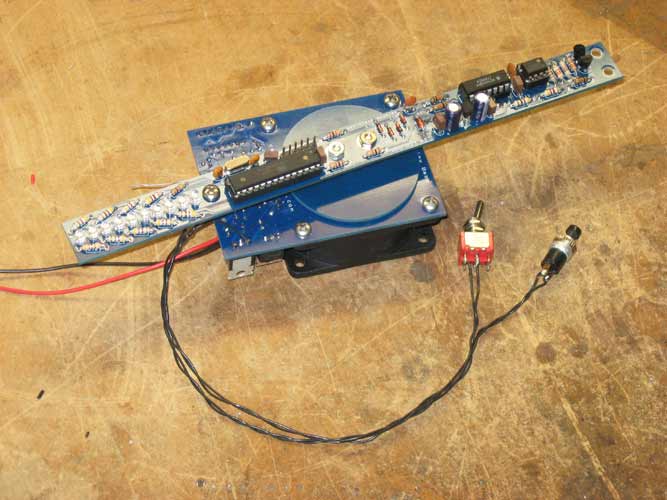
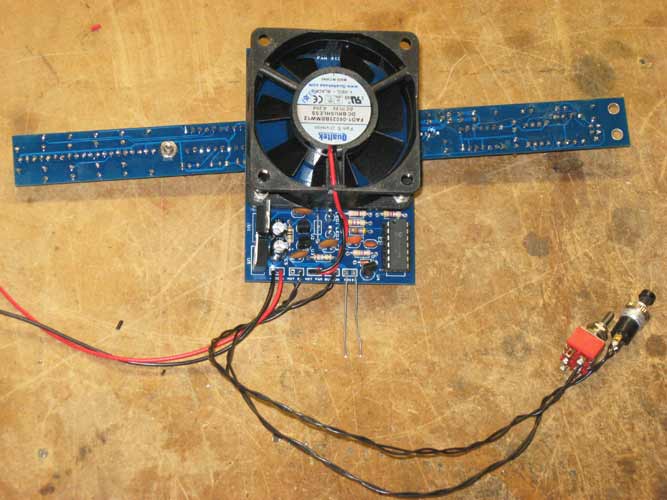
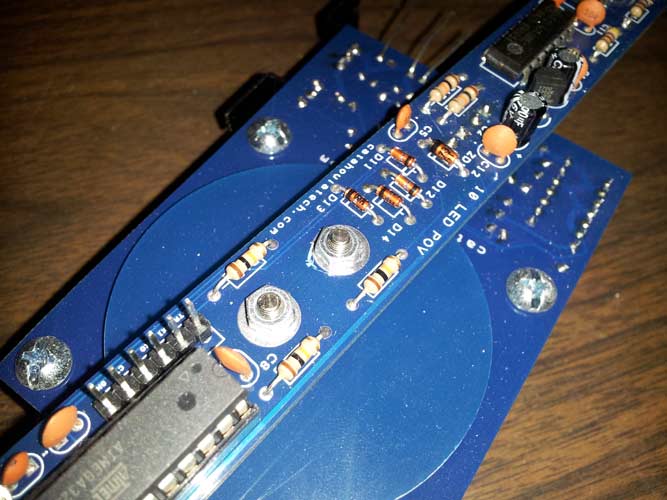
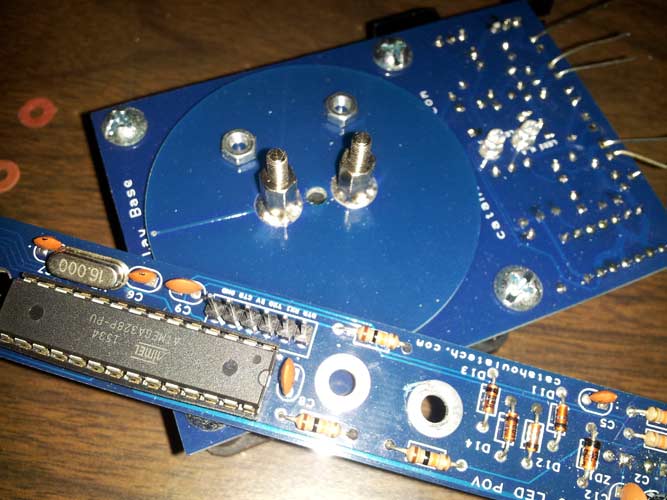
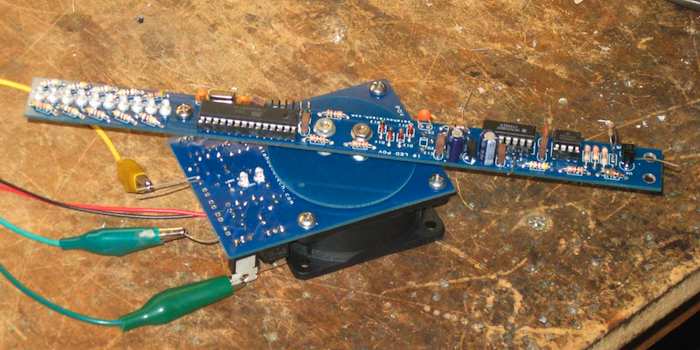
The Catahoula Technologies POV Display Kit is available for purchase to replicate this project.
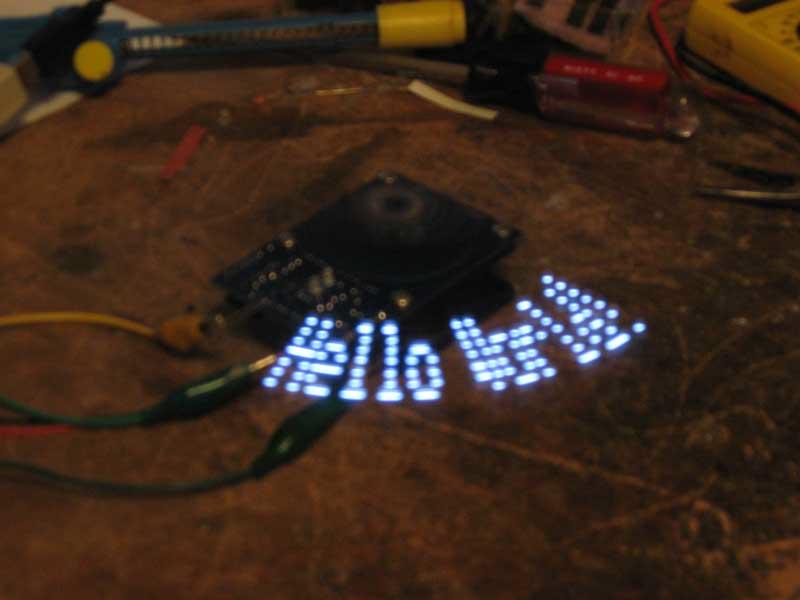
Arduino Code Example 1: 360-degree Scrolling Message Board
Arduino Sketch:
- Version 1.0: povLedMsgDisplay1.0.ino
- Flip the pixelmap for the message board to be readable at the top or bottom (there is a #define constant already in code to select).
- Display fixed message strings without needing the FSK circuitry or a PC transmitting over RS232 (there is a commented out snippet of code in the example to do this).
- Display pixel graphics transmitted from the PC. Instead of translating a RS232 character as an ASCII bitmap, the RS232 character could potentially represent pixel values in a column. A PC running software (C code, Python or your favorite script, LabVIEW, etc.) could translate images into RS232 messages that this display could show.
- Interactive display. Program a Pong game to be shown on this display and use PC keyboard strokes for moving the paddle! I would love to see that Arduino sketch!
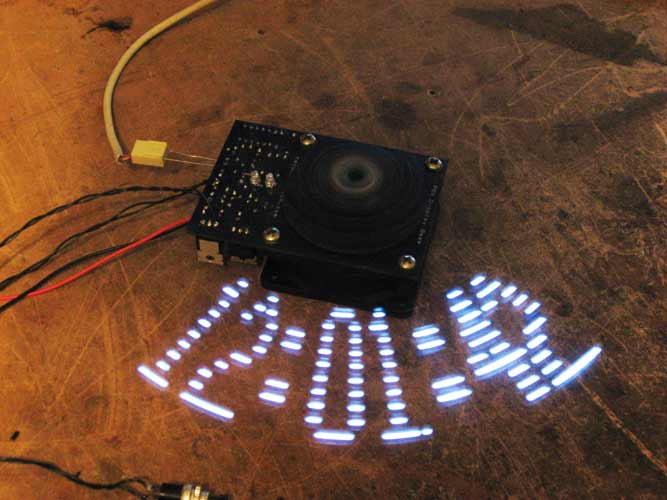
Arduino Code Example 2: Digital Clock
Arduino Sketch:
- Version 1.0: povLedTimeDisplay1.0.ino
- Version 1.1: povLedTimeDisplay1.1.ino - Added pushbutton support to update the time and leading 10 hour digit 0 will be hidden.
- Flip the pixelmap for the time to be readable at the top or bottom (there is a #define constant already in code to select).
- Update the time in a better way, i.e. update hours and minutes separately.
- Use RS232 messages from a PC to update the time.
- Other possible display modes include the classic analog clock with hands, 3 row pie chart or moving lines/dots for hours, minutes, and seconds.
Do It Yourself
- Acquire the Catahoula Technologies POV Display kit.
- Assemble the PCBs and parts (you may need to order parts from other sources). First solder the parts on the PCBs and check through the Assembly Notes in the document provided on the Catahoula Technologies website.
- Connect the programmer to the debug header on the POV Display board just like shown in the first video for the Scrolling LED Message board. Be sure power is turned off on the base PCB and also obviously the motor. The programming header on the PCB actually ties the 5V pin directly to the power rail of the POV board rather than into the regulator. This is because the design originally used 5V for everything, but 3.3V is used now on the POV board for better regulation. 5V can still be applied without damage for programming only. If you have 3.3V programmers or Arduino boards with RX/TX that you'd like to use then you can apply power to the base PCB so the POV Arduino is powered and tie GND/RX/TX to the programmer.
- If you have never used Arduino before, go to www.arduino.cc and look in the Downloads section to get the latest Arduino IDE development envrionment software. In this software, you can open a "Sketch" which carries the .ino file extension.
- Open the supplied example Arduino sketch, compile and upload it in the IDE. In the Arduino IDE settings, ensure the "Arduino Uno" is selected and the correct COM port is selected. If you are using a PC that has one built in then it is most likely COM1 by default. The Arduino programmer will most likely have a different COM port number so check the Windows Device Manager.
- Remove the Arduino programmer and apply power to the POV base and motor. That's really all there is to it!
One thing I can anticipate going wrong very easily is the FSK circuitry and RS232 transmissions fail. Keep in mind the FSK circuit is a mixed analog and digital circuit, and very inexpensive so be careful to read the descriptions above to understand how it works and read all the Assembly Notes in the document on the Catahoula Technologies website. If you are interested in a simple clock or fixed message board display without a desire to use the RS232 transmission feature then assembly should be more straight-forward. However, keep in mind that by leaving parts off the PCB, the weight distribution shifts so there are holes on the PCB for adding screws and nuts for counterbalance if necessary.